
Industry-Specific Solutions
Install a Door Kicker Plate: Step-by-Step for Contractors
Introduction
Installing a door kicker plate is essential for protecting entryways from wear and tear, particularly in Nebraska’s harsh weather conditions. This guide provides contractors with a clear, step-by-step approach to ensure a flawless installation, detailing the essential tools and materials needed for success. Misalignment or improper measurements can lead to costly rework and delays. Mastering these details ensures a long-lasting installation that meets both functional and aesthetic standards.
Gather Necessary Tools and Materials
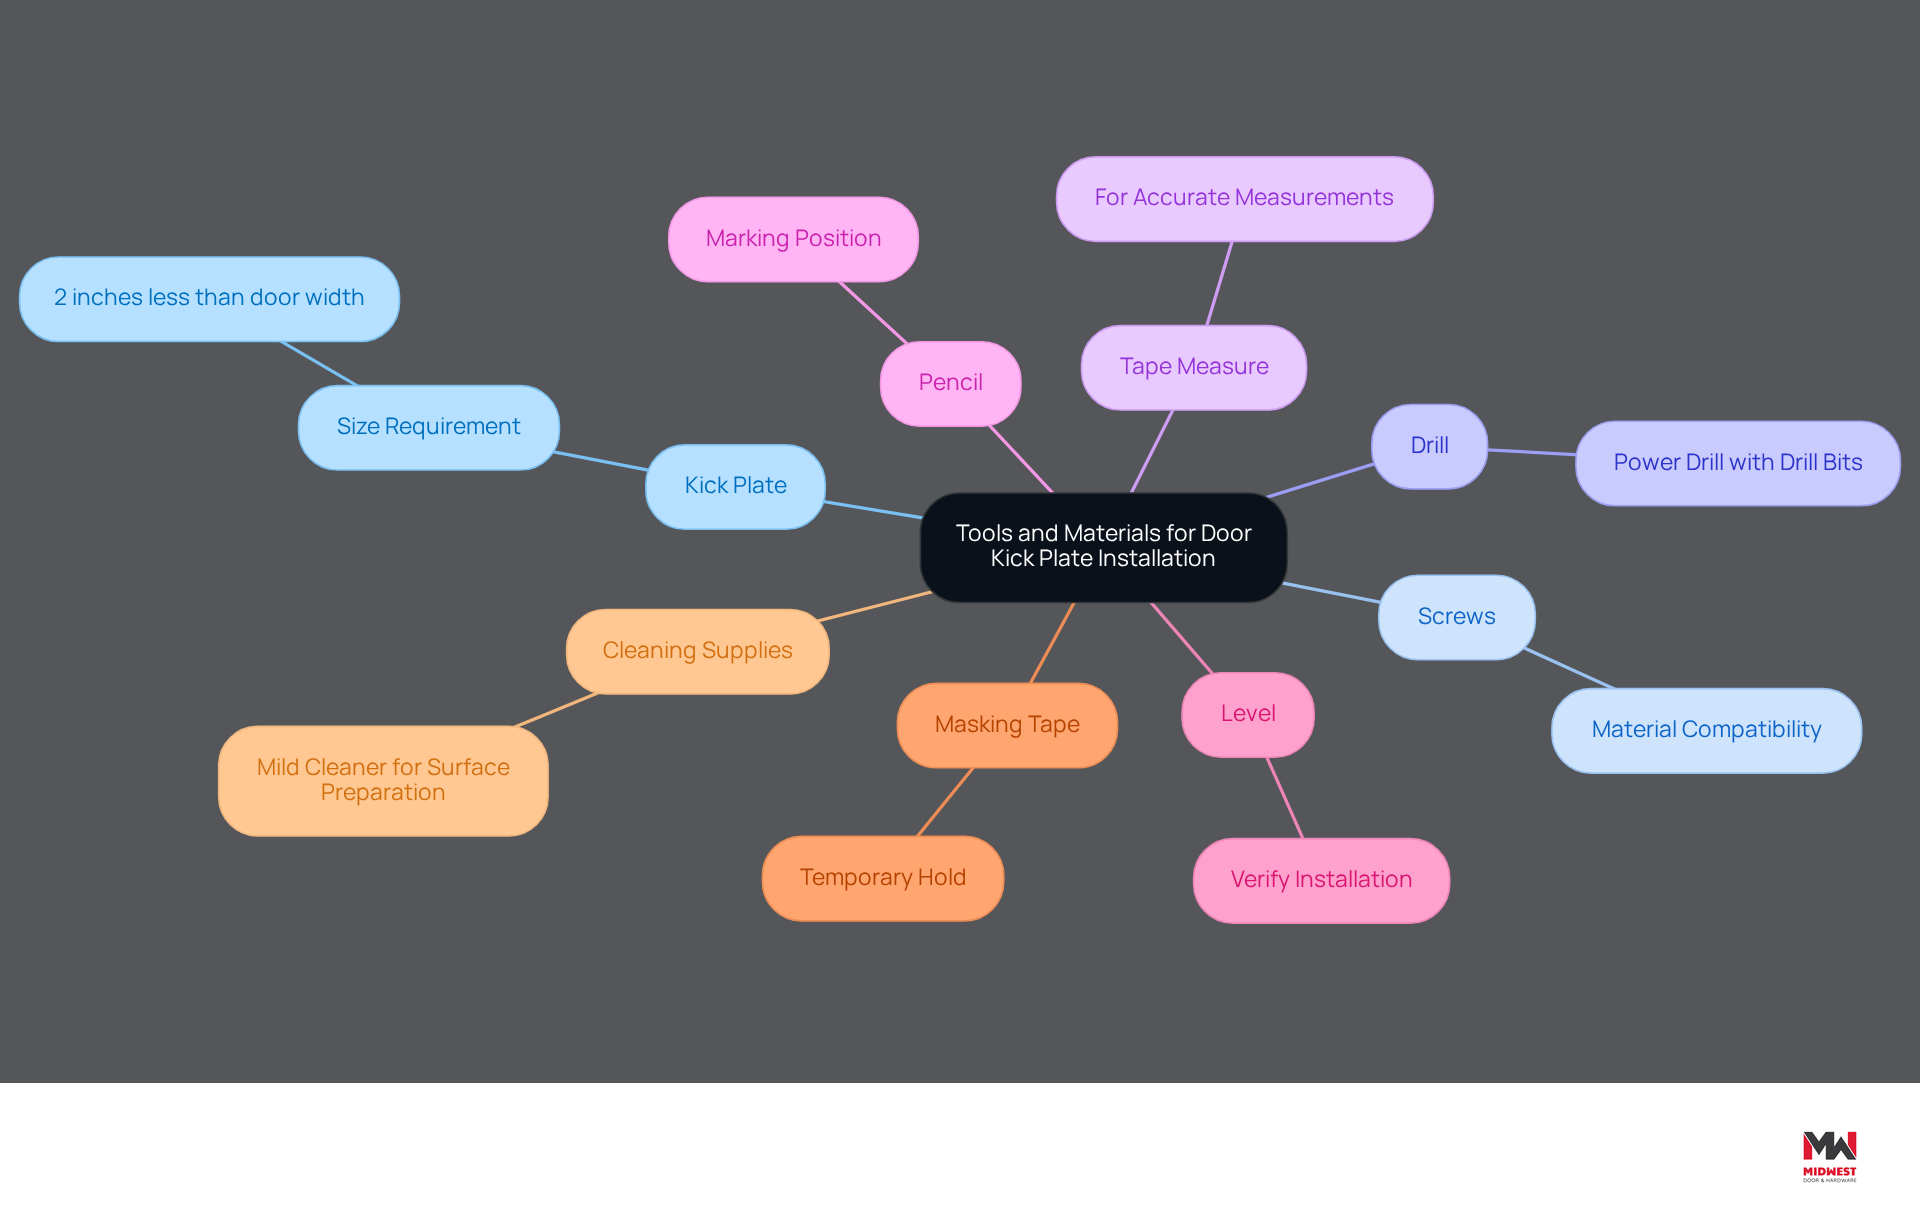
To install a door kick plate effectively, having the right tools and materials is crucial:
- Kick Plate: Ensure it is the correct size for your door, typically 2 inches less than the door width.
- Screws: Typically provided with the threshold; confirm they are appropriate for the material of the entry.
- Drill: A power drill equipped with the appropriate drill bits for creating pilot holes.
- Tape Measure: For accurate measurements of both the entryway and kickboard.
- Pencil: To indicate the position of the threshold on the door.
- Level: To verify the footboard is installed correctly.
- Masking Tape: To temporarily hold the footrest in position while marking.
- Cleaning Supplies: A mild cleaner to prepare the surface of the entryway.
Having these tools ready ensures a smooth installation process and minimizes potential delays. The entrance protection market is projected to grow at a CAGR of 4.8% from 2025 to 2033, driven by increasing demand for durable entry accessories (source: Raksha Sharma). Additionally, case studies highlight the importance of using high-quality materials, such as stainless steel and aluminum, which are favored for their durability and low maintenance requirements. For instance, the door kicker plate made of stainless steel captured nearly two-fifths of the market share in 2025 (source: Raksha Sharma), underscoring its popularity in both commercial and residential applications. Meeting fire-rated and tornado-rated standards can be challenging but is essential for safety and adherence to industry regulations. By preparing adequately, you ensure your installations meet safety standards and enhance the overall quality of your entries.
Measure and Mark the Door for Installation
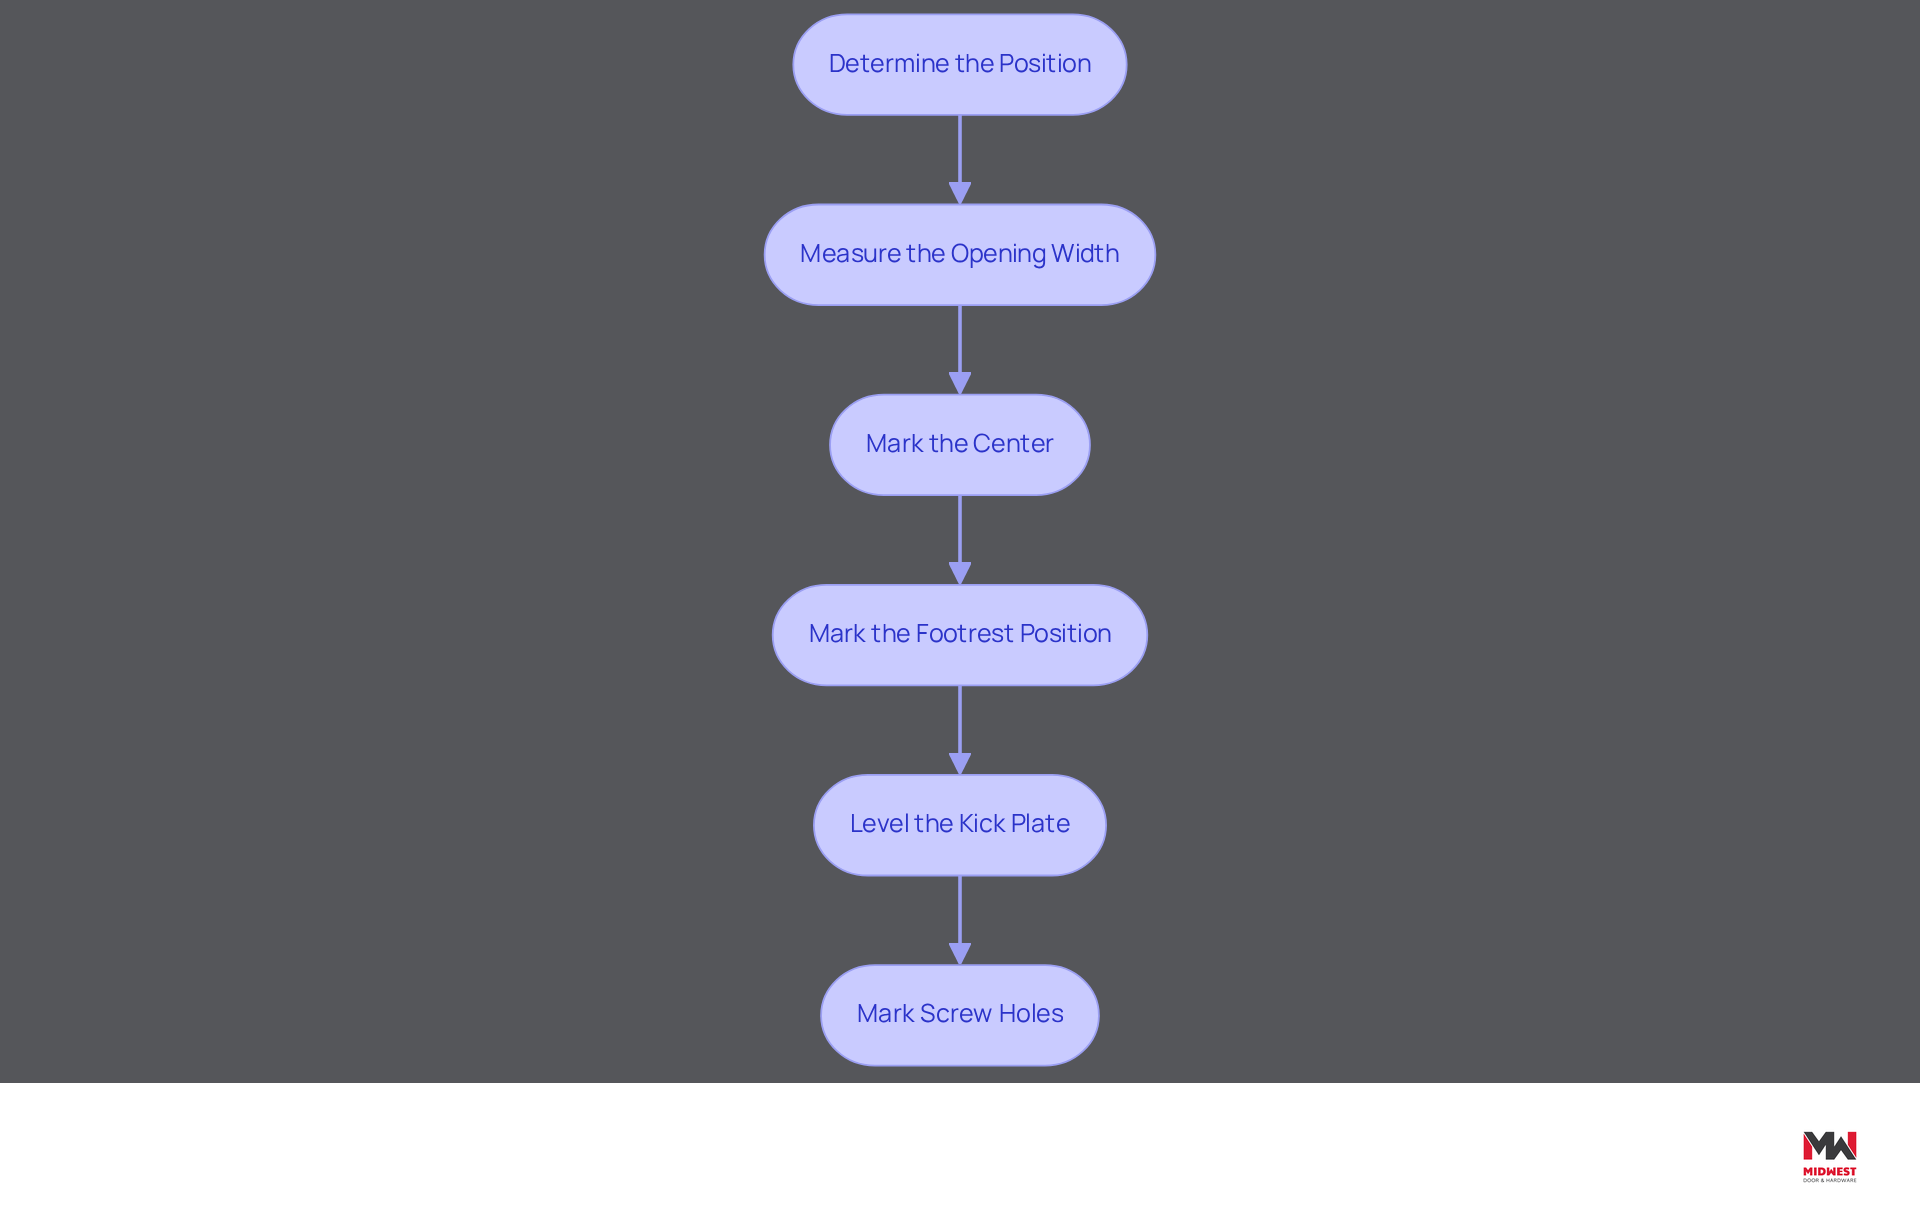
Getting the measurements right is vital for a successful door kicker plate installation; it ensures both functionality and visual appeal.
- Determine the Position: Decide on the height for the footrest, typically between 6 to 8 inches from the bottom of the entryway. This height can be chosen based on personal preference, ensuring it provides adequate protection while maintaining aesthetic appeal.
- Measure the Opening Width: Use a tape measure to find the width of the entrance. For optimal fit, subtract 2 inches from this measurement to determine the width of the bottom trim. This reduction is essential to ensure proper closure of the entrance. For instance, a typical 36-inch outside entry should have a protective strip width of 34 inches.
- Mark the Center: Identify the center of the entrance and lightly mark it with a pencil for reference.
- Mark the Footrest Position: From the center mark, measure 1 inch to the left and right to indicate where the edges of the footrest will be located.
- Level the Kick Plate: Utilize a level to ensure that your marks are straight and adjust as necessary to maintain alignment.
- Mark Screw Holes: If the base features pre-drilled holes, align it with your marks and indicate the screw hole positions on the entry.
Before you start, check the door material to make sure it works with the foot guard. Additionally, inspect the protective packaging and adhesive film that comes with the threshold for color and finish before proceeding. These measurements and preparations are key to ensuring a perfect fit for your threshold. This not only boosts functionality but also enhances aesthetics. A precise installation of the door kicker plate not only protects your entryway but also extends its lifespan.
Install the Door Kick Plate
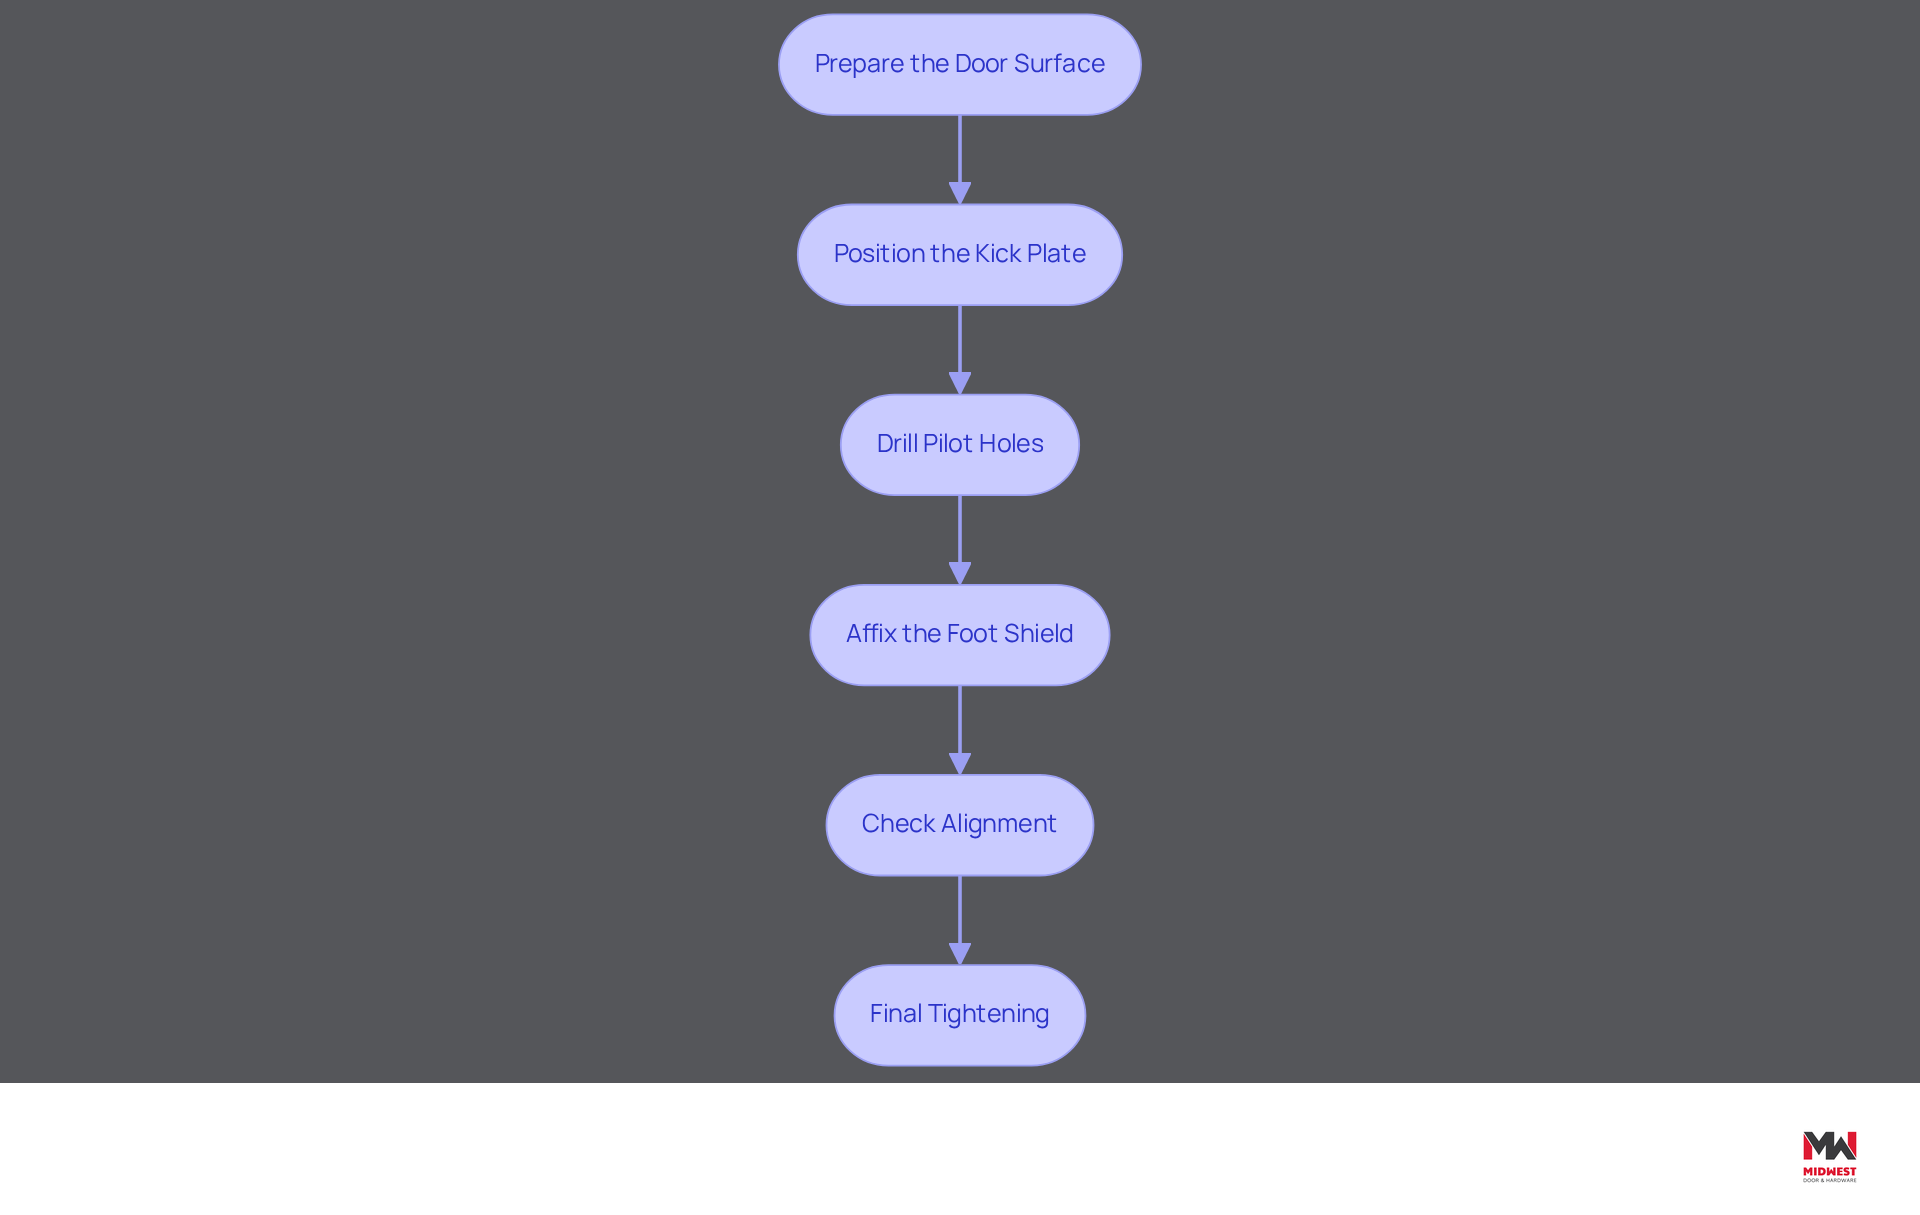
To ensure a successful installation of the kick plate, follow these essential steps for optimal results:
- Prepare the Door Surface: Start by cleaning the area where the foot guard will be installed, ensuring it is free from dust and grease to promote optimal adhesion. The temperature of both the entryway and the lower panel should be between 45-80 degrees F for proper bonding.
- Position the Kick Plate: Hold the kick plate against the entry, aligning it with your marked positions. Use masking tape to temporarily secure it in place, ensuring it is level.
- Drill Pilot Holes: Create pilot holes at the marked fastener positions using a drill. This step is essential as it prevents the entrance from splitting when placing the fasteners, which is particularly significant for wooden and solid entries. For wooden entries, consider utilizing self-drilling fasteners to ease the installation procedure.
- Affix the Foot Shield: Align the foot shield with the pilot holes and attach it to the door using the fasteners. Begin with the upper fasteners, then proceed to the lower ones, ensuring level alignment throughout the process.
- Check Alignment: Once all fasteners are secured, verify that the bottom trim is even. Make any necessary adjustments to ensure a perfect fit.
- Final Tightening: Securely tighten all screws to ensure the base is firmly attached to the entryway, enhancing its durability and functionality.
Following these steps ensures a secure installation of your door kicker plate. This door kicker plate will protect against impacts and moisture while enhancing the entryway’s appearance. In commercial environments, where entrances experience higher traffic, choosing durable materials like stainless steel or aluminum is advised to endure wear and tear. Investing in high-quality materials ensures longevity and reduces maintenance costs in the long run.
Finalize Installation and Maintenance Tips
To maximize the longevity and effectiveness of the kick plate installation, follow these essential maintenance tips:
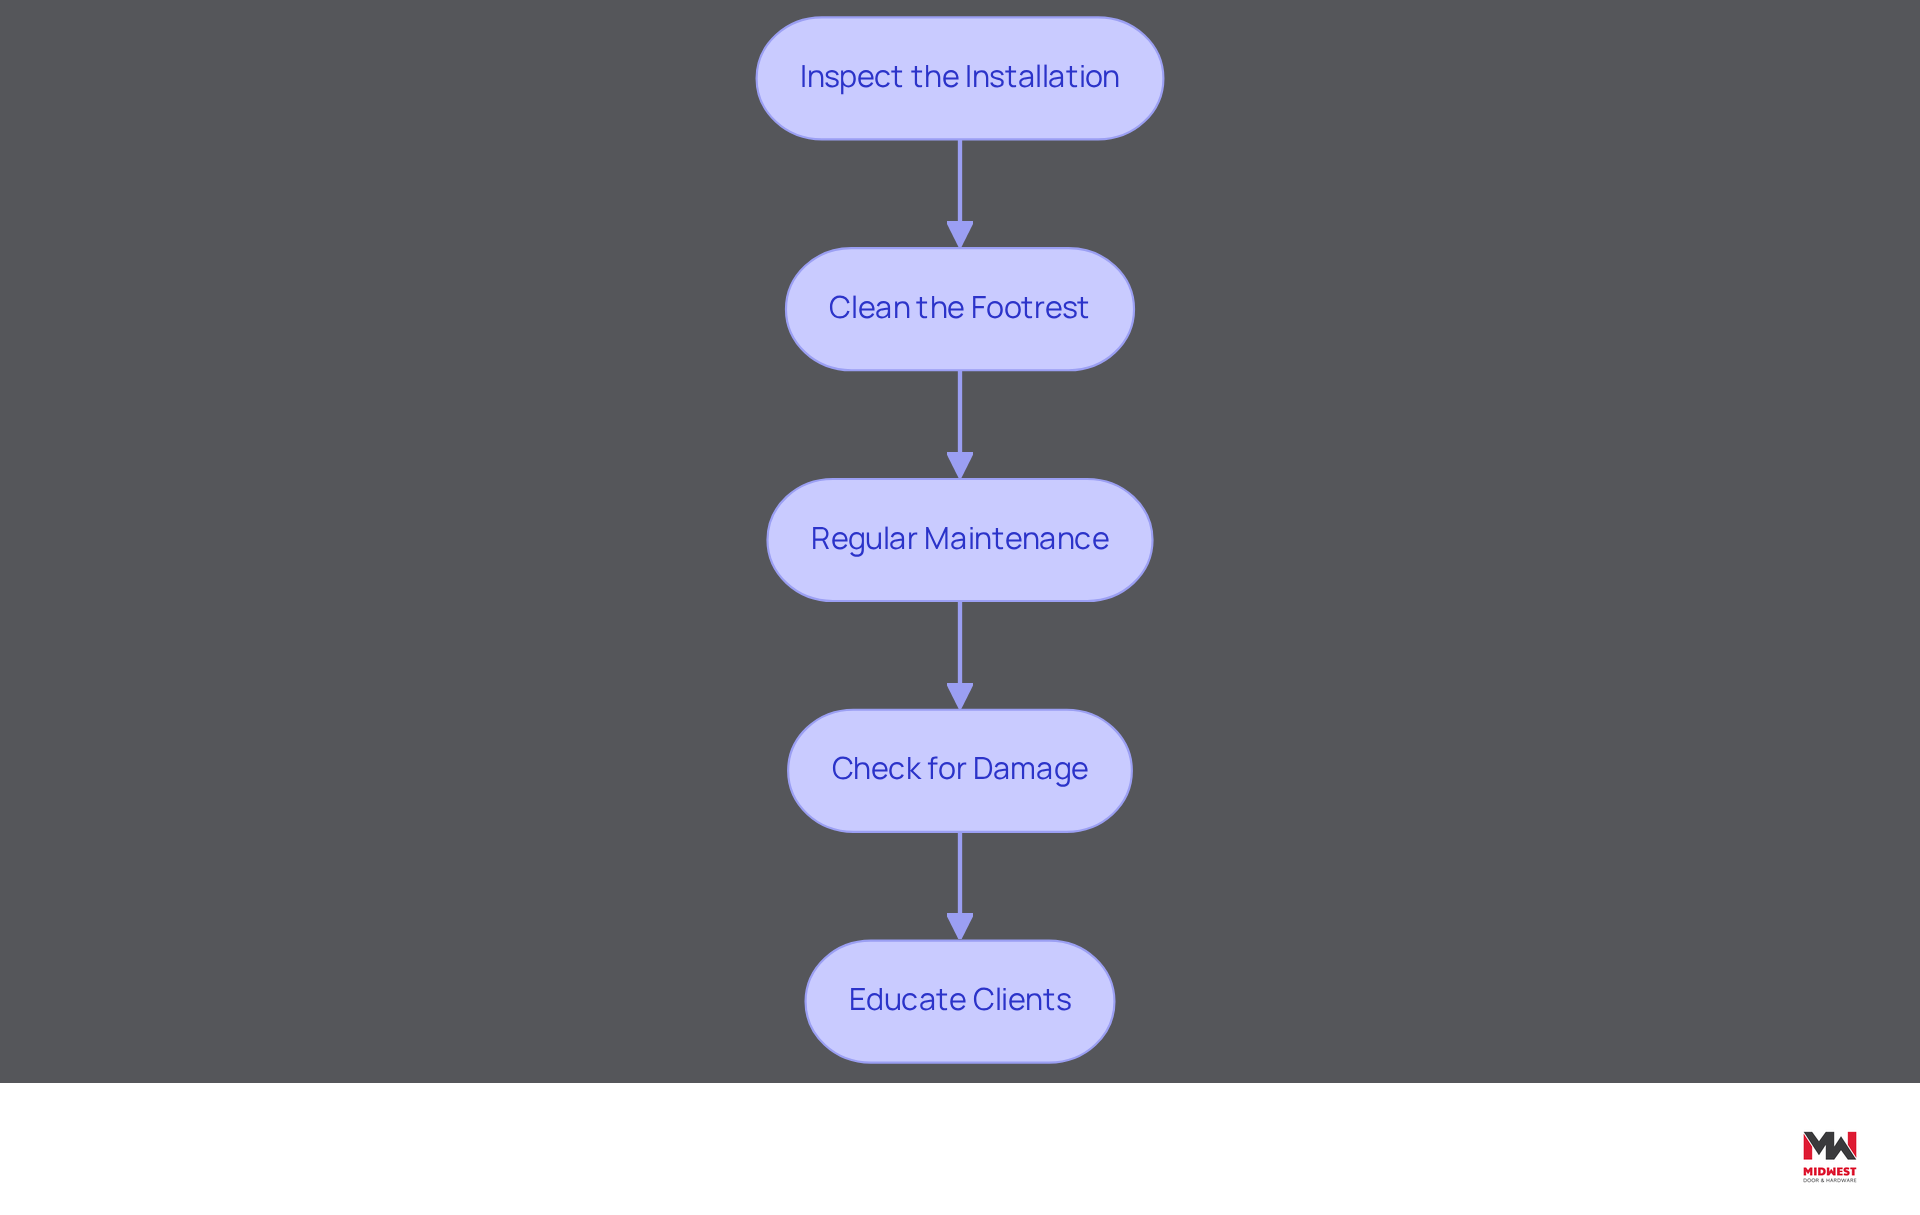
- Inspect the Installation: Regularly check for loose fasteners or misalignment. Tighten screws as needed to ensure a secure fit for the footrest.
- Clean the Footrest: Use a gentle cleaner and a soft cloth to wipe down the footrest, eliminating fingerprints and smudges from the installation process. Avoid harsh chemicals that could harm the finish, especially on metal surfaces.
- Regular Maintenance: Conduct inspections every 3-6 months to ensure all protective elements are intact. This can help clients avoid significant repair costs down the line. Advise clients to clean the footrest frequently to prevent dirt and grime accumulation, maintaining its appearance and functionality.
- Check for Damage: Periodically examine the footrest for signs of wear or harm, especially in high-traffic zones. Neglecting to replace a damaged footrest can lead to increased wear on the entryway, resulting in costly repairs.
- Educate Clients: It’s important to share with clients how the protective panel not only safeguards the entrance but also enhances its visual appeal.
Following these maintenance tips will help contractors keep the kick plate functional and visually appealing over time. Additionally, ensuring compliance with NFPA 80 and ICC 500 standards not only enhances safety but also reinforces the contractor’s commitment to quality and reliability.
Conclusion
Installing a door kicker plate is a critical task that significantly impacts both durability and aesthetics of entryways. By gathering the right tools and materials and following proper installation steps, contractors can meet safety standards and provide lasting protection for the door.
Key points discussed include the importance of precise measurements, which are essential for a successful installation. The article emphasizes the need for high-quality materials, such as stainless steel or aluminum, especially in high-traffic commercial environments. Additionally, regular maintenance and inspections are vital to prolonging the life of the kick plate and maintaining its functionality and appearance.
Ultimately, installing a door kicker plate is a smart investment that enhances both protection and appearance. By adhering to best practices and utilizing quality products, such as those offered by Midwest Door & Hardware, contractors can deliver exceptional results that meet the demands of Nebraska’s unique climate and building needs. By prioritizing quality and adherence to best practices, contractors can ensure their projects stand the test of time and meet client expectations.
Frequently Asked Questions
What tools and materials are necessary for installing a door kick plate?
The necessary tools and materials include a kick plate (correct size for your door), screws (appropriate for the material), a power drill with drill bits, a tape measure, a pencil, a level, masking tape, and cleaning supplies.
How should the size of the kick plate be determined?
The kick plate should typically be 2 inches less than the width of the door.
Why is it important to have the right tools for installation?
Having the right tools ensures a smooth installation process and minimizes potential delays.
What is the projected growth rate of the entrance protection market?
The entrance protection market is projected to grow at a CAGR of 4.8% from 2025 to 2033.
What materials are favored for door kick plates and why?
High-quality materials such as stainless steel and aluminum are favored for their durability and low maintenance requirements.
What market share did stainless steel door kick plates capture in 2025?
Stainless steel door kick plates captured nearly two-fifths of the market share in 2025.
What standards should be met for safety during installation?
It is essential to meet fire-rated and tornado-rated standards to ensure safety and adherence to industry regulations.
List of Sources
- Gather Necessary Tools and Materials
- What is a door kick plate? Buyer’s guide and installation tips (https://kofflersales.com/blog/door-kick-plate?srsltid=AU7gw4UbwRu8AgZWN_hrIFWCbotFS2H4ZnvFaHuVTOIRXAuFd0v3socj)
- Kick Plate Elevator: 2026 Innovations & Trends (https://accio.com/business/kick-plate-elevator)
- Kick Plates Market (https://pmarketresearch.com/auto/kick-plates-market)
- News (https://qualitydoor.com/blogs/news?srsltid=AU7gw4UJ-nor6bg4hXUzWp5pnlGPWRK8uXP6oMkuZsSwK6a-hrosGc8X)
- Door Kick Plate Market Size, Share & Growth | USD 2.22 Bn by 2033 (https://growthmarketreports.com/report/door-kick-plate-market)
- Measure and Mark the Door for Installation
- What is a door kick plate? Buyer’s guide and installation tips (https://kofflersales.com/blog/door-kick-plate?srsltid=AU7gw4XwfKjM4DBEgsH6LmxZrVbuGWUVeugpsqzBMzglBxcBst5t1yNK)
- How to Measure & Install Your Door Plate (https://deckthedoordecor.com/pages/how-to-measure-install-your-door-plate?srsltid=AU7gw4XxVpM8SQUlkrJAVnDFT7f6uxyn2ahCEzQ2JRaZI5pjYh8IFshr)
- Measuring, Ordering and Installing a Kickplate | TheKickPlateStore (https://thekickplatestore.com/how-to-measure-and-install-your-kickplate?srsltid=AU7gw4XRRCtRYiWV_4YcoU38EkpwEnkuhkQ1PYJ-iKXKGYrREix0XCsI)
- Install the Door Kick Plate
- How to Measure & Install Your Door Plate (https://deckthedoordecor.com/pages/how-to-measure-install-your-door-plate?srsltid=AU7gw4UuTAFzB1p3dSt535LNBNnOcA0FL8JR7KwUY4dyu11LxYngUqzk)
- The Benefits of Installing Door Kick Plates (What Homeowners Should Know) (https://carterbay.com/blog/the-benefits-of-installing-door-kick-plates-what-homeowners-should-know)
- Door Kick Plates: Types, Benefits & Installation Guide (https://liwoodrenewal.com/door-kick-plates-guide-long-island-llc)
- The Benefits of Installing Door Kick Plates (https://justkickplates.com/blogs/news/the-benefits-of-installing-door-kick-plates-what-homeowners-should-know?srsltid=AU7gw4XNjp1vDcEboKNAjUR7ZdCgm3PA1oIhIuogr7URqtKfQmo4ykJ4)
- Finalize Installation and Maintenance Tips
- A Guide to Hospital Door Protection: Kick Plates, Edge Guards, and Frame Protection (https://yizhongalu.com/news-a-guide-to-hospital-door-protection-kick-plates-edge-guards-and-frame-protection.html)
- Kick Plates & Door Protection Guide | CDF Distributors (https://cdfdistributors.com/blog/post/kick-plates-and-protection)
- Best Practices for Using Protective Door Plates in Construction (https://midwestdoor.net/news/best-practices-for-using-protective-door-plates-in-construction)
- Door Kick Plate Market Size, Share & Forecast Report 2025 to 2034 | Dataintelo (https://dataintelo.com/report/door-kick-plate-market)
- Preventative Maintenance for Doors and Hardware – Midwest Door & Hardware (https://midwestdoor.net/news/category/preventative-maintenance-for-doors-and-hardware)
Start Your Build
Got a project? We'll bring frames, doors, hardware, and the expertise to keep every opening on schedule.