
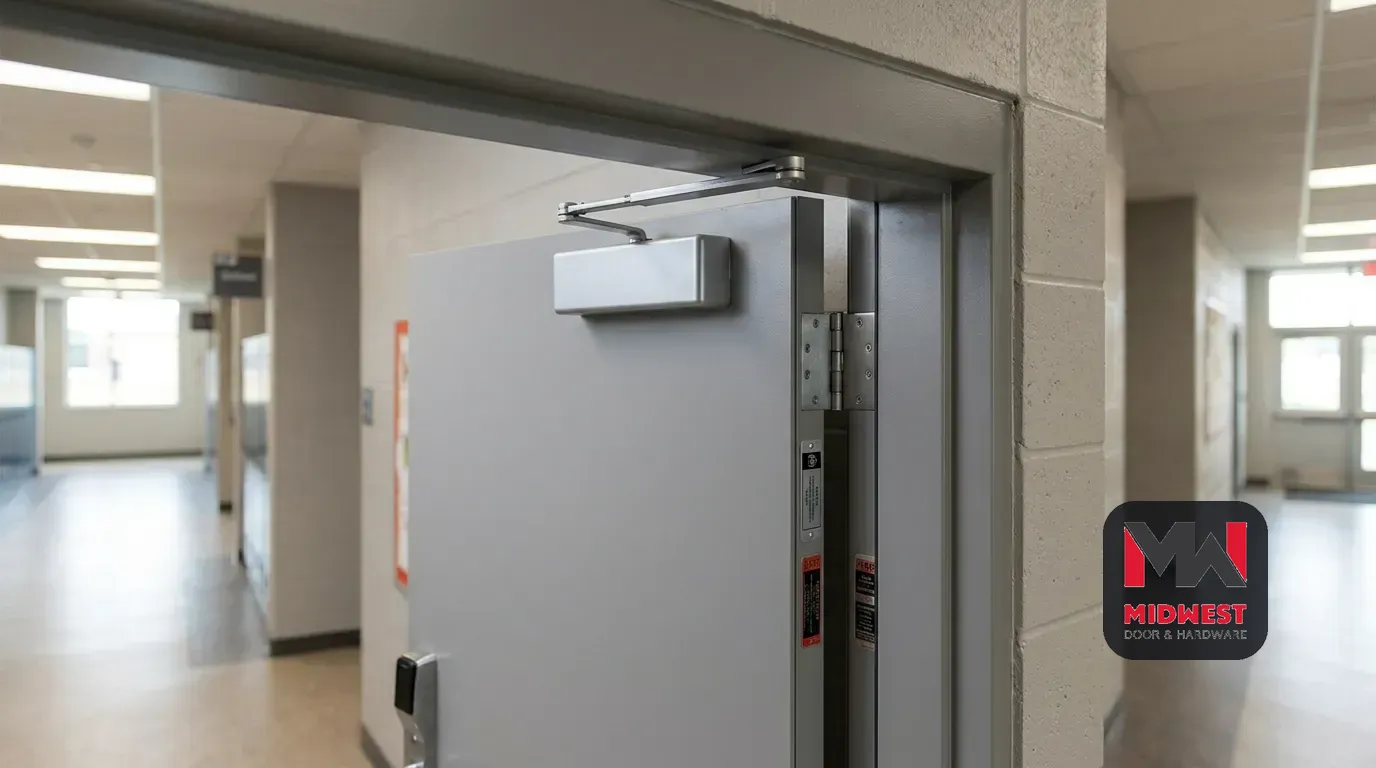
door closer arm
Commercial Door Closer Arms: Identification, Replacement, and Fire-Rated Opening Checks
Identify the closer arm as part of the complete opening
A commercial door closer arm should be identified as part of the complete opening, not as an interchangeable loose part. For a school, hospital, church, arena, or other public-building opening in Lincoln or elsewhere in Nebraska, start with the door, frame, closer body, arm, mounting points, and operating symptoms together.
Because the arm arrangement affects the connection and available clearance, the replacement arm and mounting hardware must suit the existing installation.
Use this sequence before you order anything:
- Identify where the closer body is mounted.
- Identify where the arm, shoe, bracket, or track is attached.
- Record the closer markings and series information.
- Inspect the connections and the opening’s behavior.
- Check whether the door is part of a fire-rated opening.
- Match any proposed component to the complete installation rather than to appearance alone.
This approach separates a loose fastener question from a damaged arm, a failed closer, an incompatible replacement, or a fire-rated assembly issue.
What the commercial door closer arm does
The arm, shoe, bracket, or track forms the mechanical connection between the closer assembly and the door or frame.
The arm therefore affects more than the appearance of the hardware. Its geometry, attachment point, and relationship to the closer configuration influence how the door moves through the closing cycle.
The arm is not the same thing as the closer body. The body may be surface-mounted, concealed, or integrated into another part of the opening. The arm may be a two-part assembly with a shoe or bracket, a parallel arm attached into the frame soffit, or a single-lever arm that travels in a track. Those differences matter when you identify a replacement.
Do not assume that an arm with a similar shape will produce the same installation. Different arm arrangements can require different components, and the existing closer series, mounting application, hole locations, and available clearance all affect the match. Preserve the complete connection from closer to door or frame when you document the opening.
Recognize the arrangement from mounting position and visible geometry
Commercial closer arrangements include regular-arm, top-jamb, parallel-arm, track, and concealed configurations. You can usually narrow the arrangement by looking at the closer body, the arm’s direction, the shoe or bracket, and the side of the opening where each component is mounted.
Use these visible indicators as an identification guide:
- Regular arm: The closer is mounted on the pull side of the door, with the arm attached to the face of the frame above the opening.
- Top-jamb: The closer is mounted on the push side of the frame, with the arm attached to the face of the door.
- Parallel arm: The closer is mounted on the push side, with the closer body on top of the door and the arm fastened into the frame soffit. When the door is closed, the arm folds parallel to the door face.
- Track closer: A track is mounted on the door or frame, and a single-lever arm travels in that track. The arrangement may be on the push or pull side.
- Concealed arrangement: The closer body is hidden in the frame head, top of the door, or another concealed location, so access and preparation become part of identification.
The mounting side gives you a starting point, not a complete replacement specification. A surface-mounted arm can still require a particular closer series, shoe, bracket, fastener pattern, or clearance. If the body is concealed, do not remove covers or alter preparation simply to make the hardware easier to identify; record what is visible and refer the opening for a closer review when the model or connection remains uncertain.

Compare regular-arm, top-jamb, and parallel-arm configurations
Regular-arm, top-jamb, and parallel-arm configurations differ mainly in mounting side, attachment surface, and the position of the arm when the door is closed. Those differences are enough to rule out many visually similar replacement parts.
| Configuration | Where to look | What the visible arrangement tells you |
|---|---|---|
| Regular arm | Pull side of the door | The arm attaches to the face of the frame above the opening. |
| Top-jamb | Push side of the frame | The closer is mounted on the frame, and the arm attaches to the face of the door. |
| Parallel arm | Push side of the opening | The closer body sits on top of the door, while the arm fastens into the frame soffit and folds parallel to the door face when closed. |
A regular-arm arrangement leaves the arm projecting from the closer toward the frame face. A top-jamb arrangement reverses the relationship: the closer is on the frame, and the arm reaches onto the door. A parallel-arm arrangement places both the closer body and the arm connection in a different relationship to the door and frame, which can affect the hardware required and the available clearance.
The parallel arm’s folded position can make it less noticeable, but appearance is not a sufficient identification method. Confirm the mounting side and the actual connection point. Then record the closer series and mounting-hole pattern before you compare replacement arms.
If the opening uses a narrow top rail, unusual frame geometry, a drop plate, or a bracket, include that condition in the record. A mounting accessory can be part of the installation rather than an optional substitute.
Treat track and concealed arrangements as separate identification paths
Track and concealed closer arrangements need separate identification paths because their working parts may not be visible in the same way as a regular, top-jamb, or parallel arm. The visible question is not simply whether an arm is present; it is how the arm, track, closer body, and opening preparation work together.
A track closer uses a track mounted on the door or frame and a single-lever arm rather than a double-lever arm and shoe. Record the track location, the arm connection, the side of the opening, and any stop or end feature that is visible. Do not substitute a conventional two-piece arm based only on length or finish.
An overhead concealed closer places the closer in the header or top rail. A concealed-in-door closer places the closer within the top or face of the door. A floor closer is below the door beneath a floor plate. Each arrangement creates different questions about access, door and frame preparation, pivots, floor condition, moisture, spindle connection, and service clearance.
Automatic or low-energy operators also require a distinct review. The powered unit, activation devices, sensors, controls, power supply, manual operation, and door hardware must be considered together. A spring or self-closing hinge integrates the closing function into hinge or pivot hardware and should not be treated as a conventional overhead closer arm.
For any of these arrangements, photograph the visible hardware and record where the working connection disappears. That information helps a commercial hardware specialist identify the correct service path without assuming that a familiar surface-mounted part is compatible.
Record the closer and opening details before ordering
A replacement record should capture the closer, arm, mounting application, and opening conditions before you request a part. The goal is to give the matching process enough information to distinguish a compatible arm from a part that merely looks similar.
Record these details for each opening:
- Closer identification: Photograph or transcribe the brand, model, series, size marking, and any label on the closer body or cover.
- Arm arrangement: Note regular-arm, top-jamb, parallel-arm, track, or another visible configuration. Include the shoe, bracket, drop plate, or track if present.
- Mounting location: Record whether the closer body is on the door, frame, header, top rail, or floor, and whether the arm is on the push or pull side.
- Connection details: Note the arm-to-spindle connection, arm-to-shoe or bracket connection, track location, and mounting-hole locations.
- Clearance: Photograph nearby trim, walls, glazing, projecting hardware, and any condition that limits the arm’s travel or the closer’s position.
- Door and frame: Record construction, approximate door size, frame type, and whether the door is single or paired. Concealed arrangements require particular attention to preparation and service access.
- Handing where specified: Include the handing shown by the existing hardware or project information rather than guessing from the approach side.
- Opening function: Note whether the opening is an interior passage, exterior door, fire-rated opening, high-traffic entrance, or another controlled use.
Replacement arms and mounting hardware must suit the existing installation because regular-arm, top-jamb, and parallel-arm arrangements can require different components. If the record is incomplete, pause before ordering and obtain a review of the closer series, mounting application, and complete opening.

Inspect the arm, connections, and closer body for failure clues
A closer-arm inspection starts with visible condition and connection stability rather than with an adjustment screw. Look at the arm, forearm, spindle connection, shoe or bracket, mounting screws, closer body, and cover without assuming that the first visible symptom identifies the failed part.
Use this observation list:
- Bending or cracking: A bent or cracked arm can indicate damage or force beyond the arm’s intended condition.
- Loose mounting screws: Check the closer body, arm bracket or shoe, and arm connections. Loose mounting screws can cause erratic closer operation and accelerate wear.
- Wobble or play: Movement at the connection to the closer spindle or to the shoe or bracket can indicate loose or worn parts.
- Oil seepage, drips, or staining: Visible oil on the closer body indicates a seal problem and may require closer replacement.
- Cover condition: A missing, loose, or damaged cover can expose the closer body to dust and debris and should be included in the service record.
- Fastener and reinforcement condition: Note missing fasteners, damaged threads, pulled mounting points, or evidence that the arm has shifted from its original position.
A loose arm connection and a failed closer body can produce similar operating complaints, but they require different responses. Do not hide movement by adding an unverified fastener or substitute arm. Record the condition, identify the closer series, and compare the entire mounting application before you decide whether adjustment is appropriate.
Use door behavior as a clue, not a diagnosis
Door behavior is an inspection clue, not a diagnosis. A door that slams, moves slowly, stops before closing, or fails to latch can have several causes, including closer problems, binding, alignment, seals, pressure, arm geometry, or another opening condition.
Describe the behavior precisely instead of labeling the arm as defective:
- Does the problem occur through the full swing or only near the latch?
- Does the door stop at the same point every time?
- Does the arm visibly move, wobble, bind, or contact another surface?
- Does the door reach the frame but fail to latch?
- Is there visible oil on the closer body?
- Did the symptom begin after impact, hardware work, weather change, or another opening change?
A symptom alone does not establish that the arm needs adjustment or replacement. For example, a non-latching door can reflect latch or strike friction, alignment, seals, pressure, insufficient closing action, or exit or electric hardware. A slow door can reflect physical resistance as well as closer control.
Use the behavior to decide what to inspect next. Do not use it as permission to alter a closer setting or order an arm without checking the physical opening.
Decide whether the issue is adjustment, replacement, or service
An adjustment, replacement, or service decision depends on the condition of the arm and the cause of the door behavior, not on the symptom alone. Separate the decision into three paths so you do not treat every problem as a loose arm.
An adjustment question may be reasonable when the arm and closer are intact. The arm should have no visible bend or crack, the connections should be stable, and the closer body should show no oil seepage or staining. The door and frame must also be checked for binding, alignment, seals, pressure, latch or strike friction, and other physical resistance. If those conditions remain unresolved, do not use a closer adjustment to mask them.
A replacement question becomes more likely when the hardware is damaged or the closer is failing. Bending, cracking, worn connections, damaged threads, persistent looseness, or visible oil indicate that the arm or closer may not be serviceable as installed. A leaking closer may require replacement rather than valve adjustment. Match the replacement to the closer series and mounting application before removing the existing component.
A service or qualified review is the appropriate boundary when the cause is unclear. Refer the opening when the arm type cannot be identified, the mounting point is damaged, the door still behaves poorly after the physical conditions are addressed, the closer is concealed, or the proposed part does not clearly match the existing installation. A school or public-building opening can also carry fire-rated documentation that must be preserved.
Keep the opening in its existing condition until the compatibility question is resolved. Do not rely on a quick tightening, a generic arm, or a new adjustment setting as proof that the repair is suitable.
Match the replacement to the closer configuration
A replacement closer arm must match the existing closer configuration, mounting application, and opening conditions. Appearance, finish, and approximate length are not enough to establish compatibility.
Compare the proposed part against the existing installation in this order:
- Arm type: Confirm regular-arm, top-jamb, parallel-arm, track, or another arrangement.
- Closer series: Match the arm to the closer body’s series and documented component family.
- Mounting application: Confirm the door-side or frame-side location, push or pull side, and any top-jamb, parallel-arm, or track application.
- Connection geometry: Compare the spindle connection, shoe or bracket, track interface, drop plate, and support hardware.
- Mounting holes: Compare hole locations and reinforcement rather than drilling new holes by guesswork.
- Clearance: Check the arm’s path against trim, walls, glazing, adjacent doors, and other hardware.
- Handing where specified: Use the handing shown by the product or existing installation when the component requires it.
- Closer rating for the arm configuration: Use the closer’s rating for the specific arm configuration.
A closer’s size and closing force can vary with its arm configuration. A size 4 closer in parallel-arm configuration does not deliver size 4 force, so the rating for the specific configuration must be used rather than the body marking alone.
A mounting accessory can be part of the correct installation. Drop plates, brackets, and shoe supports should match both the closer series and the mounting application. If the existing arm uses a special bracket or the closer body has no legible marking, provide photographs and the complete opening record for review before selecting a substitute.

Apply an assembly review gate to fire-rated openings
A fire-rated opening must be treated as a complete door-and-frame assembly when you identify, adjust, or replace a closer arm. The closer is not an isolated accessory that can be exchanged without checking the opening’s documented components.
For a fire-rated opening, the closer must be a listed component matched to the door and frame ratings. Do not install an unlisted closer on a fire-rated opening because it can void the assembly’s rating. Fire-rated hardware must be used for fire protection doors, including hinges, locks, and closers.
Hold-open hardware requires a separate check. Hold-open closers are prohibited on fire-rated doors unless connected to the fire alarm system for automatic release. Do not treat a mechanical hold-open feature, a stop, or a field modification as an acceptable substitute for the required release arrangement.
At Midwest Door & Hardware, we specify rated openings as complete assemblies and flag the pieces that cannot be substituted. Use that assembly principle when you document a school or public-building opening:
- Identify the door and frame rating information available for the opening.
- Record the existing closer, arm, shoe, bracket, or track.
- Preserve labels, markings, and project documentation.
- Identify any hold-open or release feature.
- Stop before installing a component that is not documented as compatible with the rated assembly.
The practical boundary is simple: if the closer arm or its mounting hardware cannot be matched to the rated opening record, keep the proposed change at a review gate rather than treating a generic replacement as approved.
Prepare a complete request for commercial hardware review
A commercial door closer arm request should give the hardware specialist enough information to identify the configuration, separate adjustment from replacement, and preserve the opening record. Send one organized record for each opening rather than a part name alone.
Include:
- The closer brand, model, series, size marking, and visible labels.
- Clear photographs of the closer body, arm, spindle connection, shoe or bracket, track, mounting points, door, and frame.
- The mounting side and arrangement: regular-arm, top-jamb, parallel-arm, track, concealed, or another configuration.
- The door and frame construction, approximate dimensions, handing where specified, and available clearance.
- The mounting-hole locations, drop plates, brackets, shoe supports, and any damaged reinforcement.
- The exact symptom: slamming, slow movement, stopping, failure to latch, wobble, looseness, or visible oil.
- The opening’s use and whether it is part of a fire-rated assembly.
- Available labels, schedules, product records, and fire-rated assembly information.
We stock hollow metal doors, wood doors, hardware, fire-rated assemblies, and Division 10 items.
The right next step is to keep the arm and opening details together, avoid an unverified substitution, and request qualified review when compatibility or the fire-rated record is uncertain. A qualified professional must determine individual suitability for the specific opening.
Questions to resolve before replacing a closer arm
What information should I provide when requesting a commercial door closer arm replacement?
Provide the closer brand, model or series, size marking, arm configuration, mounting side, shoe, bracket or track details, mounting-hole locations, door and frame construction, handing where specified, available clearance, photographs, and the exact operating symptom. Also state whether the opening is fire-rated and include any labels, schedules, or assembly documentation. This helps distinguish a compatible component from one that only looks similar.
Are commercial door closer arms interchangeable between regular-arm, top-jamb, and parallel-arm installations?
No. These arrangements use different mounting locations, connection geometry, hardware, and clearance conditions. Match the replacement to the closer series and application, including the spindle connection, shoe or bracket, drop plate, mounting holes, and any required support hardware. Do not select a part by appearance or approximate length alone.
When does a loose door closer arm need more than a simple tightening?
A basic tightening may not address bending, cracking, damaged threads, persistent wobble, worn connections, oil on the closer body, shifted mounting points, or a door that still slams, stops, or fails to latch. Those signs can indicate a damaged arm, failing closer, mounting problem, or another opening condition. Keep the hardware unchanged and arrange a qualified review when the cause or compatible replacement is uncertain.
What must be checked before replacing a closer arm on a fire-rated door?
Treat the opening as a complete rated assembly. Verify the existing door, frame, closer, arm, and mounting hardware against the available documentation, and use a listed closer and fire-rated hardware matched to the assembly. Do not install an undocumented substitute or alter a hold-open arrangement without confirming the required automatic release connection. If compatibility cannot be established, stop at a review gate before removing or installing components.
Start Your Build
Got a project? We'll bring frames, doors, hardware, and the expertise to keep every opening on schedule.