
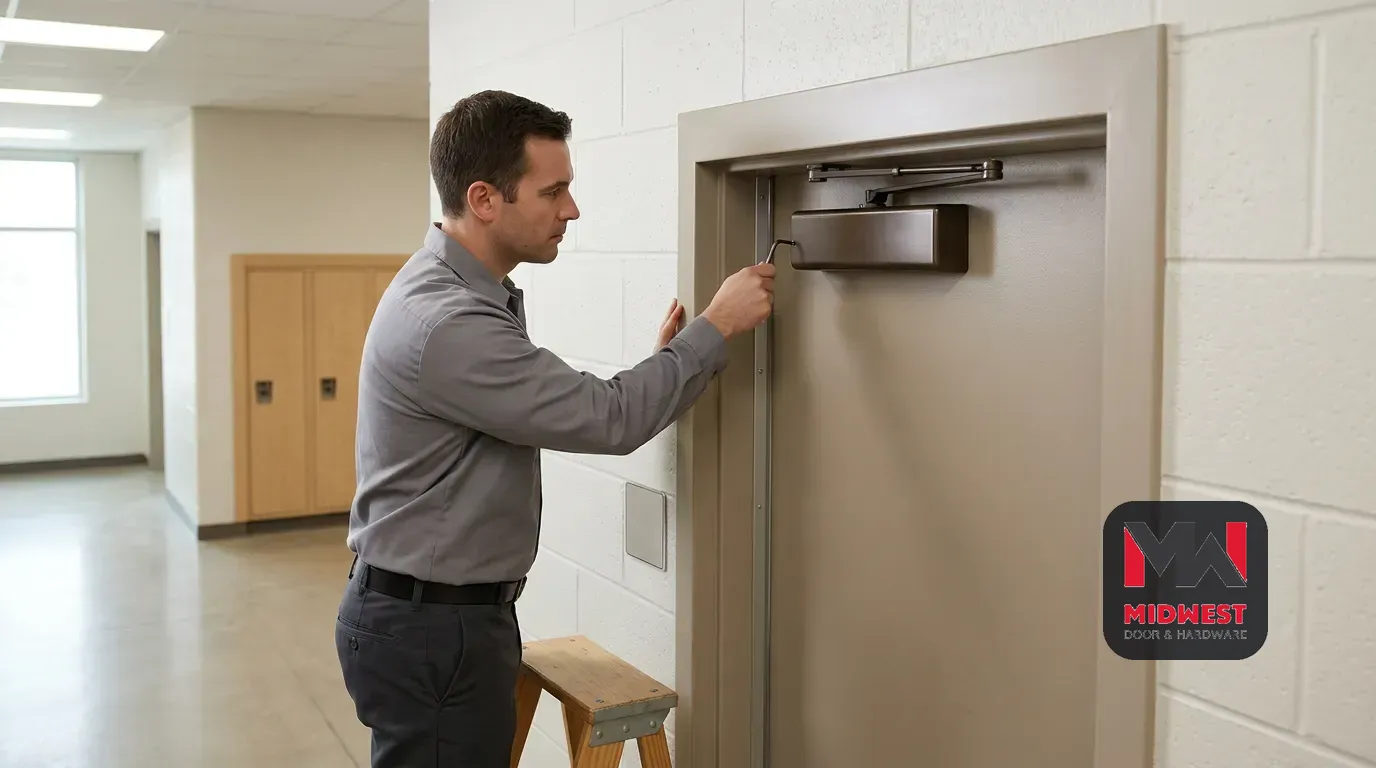
door closer settings
How to Adjust Commercial Door Closer Settings Safely
Start with the symptom and the complete opening
A commercial door closer should be evaluated as part of the complete opening before you turn a valve. A surface-mounted hydraulic closer uses a spring to move the door closed and hydraulic fluid to control that movement; the spring must provide sufficient power, while the valves control speed through different parts of the swing. A door that stops in the final few inches may have a latch-speed, arm-geometry, weatherstripping-resistance, or misaligned-latch issue, so do not automatically treat the symptom as a speed-setting problem.
The complete opening includes the door, closer, arm, hinges, frame, seals, strike, latch, and surrounding conditions. Loose hinge screws, a warped frame, or a misaligned strike can cause slamming or latch failure that closer-valve adjustment cannot correct. Start by describing the behavior precisely:
- Does the door move too quickly or too slowly through most of its closing travel?
- Does the door reach the frame but fail to engage the latch?
- Does the final inch strike hard while the main travel feels controlled?
- Does the door drag, scrape, sag, bind, or show a loose arm or mounting point?
- Is the opening fire-rated, required for egress, or used on an accessible route?
Use the symptom to identify the relevant part of the opening, not to assume that the closest visible screw is the solution.
The opening’s use changes how much latitude you have to experiment. A routine interior door with a clear model label may allow a limited, model-permitted adjustment. A fire-rated door that will not close and latch does not meet the self-closing and self-latching requirement described in the applicable fire-door guidance. Record the symptom, keep the opening under the facility’s control process, and identify the closer before deciding whether a setting change is appropriate.
Identify the closer before touching a control
Many closers have a separate spring-power adjustment, and some have delayed action. Control labels, locations, and adjustment ranges vary by manufacturer and model.
Identify the closer manufacturer and model, then review the manufacturer’s adjustment instructions before making an adjustment. Record the opening’s use and the symptom alongside the model information so the adjustment remains tied to the correct door.
Closer labels provide clues, not a universal layout. On lettered closers, S usually identifies sweep and L identifies latch; exact numbering and valve locations vary by manufacturer, so check the diagram for the specific closer. On a two-valve closer, screw 1 is usually sweep speed and screw 2 is usually latch speed, but the specific closer’s numbering controls.
The required tool also varies by model. It may be a flathead screwdriver, Phillips screwdriver, Allen wrench, 3/32-inch hex key, or 5/32-inch hex key.
The model record should answer four basic questions before any adjustment begins: what closer is installed, which control corresponds to the symptom, what tool and adjustment range the instructions permit, and how the door should be tested afterward. If any of those answers is unclear, pause at identification rather than guessing from a similar-looking closer. A generic layout is not a substitute for the diagram or instructions for the installed model.
Match each control to the part of the swing it changes
The sweep setting controls the main closing arc, while the latch setting controls the final few degrees before the door reaches the frame and the latch engages. Sweep speed controls roughly the first 80 to 90 percent of the closing swing; latch speed controls the final few degrees.
Use this working map:
- Sweep or S: Controls the long closing movement from the open position toward the latch zone.
- Latch or L: Controls the short final movement into the frame and latch.
- Backcheck or BC: Controls resistance during the opening swing and can help prevent the door from opening too fast and striking a wall or other object.
- Spring power: Controls how much force is available to bring the door back to the frame and engage the latch.
The labels describe functions, but the adjustment direction and physical layout still belong to the specific model.
Spring power is different from hydraulic speed control. Spring power determines how much force is available to bring the door back to the frame and engage the latch, while increasing spring power can make the door harder to open. On the LCN 4040XP, spring power is adjusted separately with the external power-adjustment dial on the spring tube, not with the S, L, or B valves.
Do not use spring power to correct a problem that belongs to sweep or latch speed. A door that moves at an acceptable speed but lacks enough force to latch may need a spring-power assessment, a closer-size review, or an inspection of the opening rather than another turn on a speed valve.
The point in the cycle where the symptom appears is the useful dividing line. A problem through most of the closing arc points toward sweep; a problem only as the door meets the frame points toward latch or an opening fault; resistance while the door is being opened points toward backcheck or spring force. That distinction narrows the control to inspect, but it does not prove that the control is the cause.

Check for an opening fault before changing speed
The door and frame should be checked before a speed adjustment is treated as the answer. Loose hinge screws, a warped frame, or a misaligned strike plate can cause slamming or latch failure that closer-valve adjustment cannot correct. A damaged latch or obstruction can produce a similar symptom.
Observe the opening through a full cycle and look for these conditions:
- The door drags, scrapes, or sags instead of moving freely.
- The arm or closer mounting is loose, bent, or visibly damaged.
- The latch meets the strike off-center or leaves marks from repeated impact.
- The frame, seals, or weatherstripping add resistance near the closed position.
- The door reaches the frame but the latch does not engage cleanly.
Record the condition before changing a control. The record helps separate an adjustment opportunity from a repair or replacement decision.
Refrigerated and walk-in openings require a separate condition check. Worn refrigerated-door gaskets can change closing resistance beyond what a closer valve can correct, and some walk-in cooler and freezer closers are non-adjustable by design. If the opening uses a gasket, unusual pressure, or a specialized closer, follow the installed product’s instructions and stop rather than applying a standard valve sequence.
A useful boundary is whether the door’s physical movement is free before the closing control is considered. If the door scrapes, sags, binds, or meets the strike unevenly, address the condition through qualified repair rather than increasing spring power or changing both speed valves. If the door moves freely and the symptom is confined to one part of the cycle, continue with model identification and one permitted control change.

Adjust the sweep only when the main travel is wrong
The sweep valve is the relevant control when the door is too fast or too slow through the main closing travel. Open the door to its normal operating position, release it, and watch the movement before changing anything. If the door closes too fast through the main travel, use the sweep valve and make a small adjustment; this adjustment process turns the valve clockwise to slow the sweep.
The main closing arc gives you two distinct adjustment branches:
- The main travel is too fast: Turn the sweep valve clockwise in a small permitted increment, then test the door.
- The main travel is too slow to reach the latch zone with enough momentum: Turn the sweep valve counterclockwise in a small permitted increment, then test the door.
Use those directions only where the model instructions identify the control and direction in the same way. If the door is smooth through most of its travel but fails during the final few inches, leave the sweep setting alone and assess the latch phase or the opening condition.
Watch the transition between sweep and latch after every change. A sweep adjustment should affect the long movement toward the frame, not be used to correct a hard impact confined to the final inch or two. If changing the sweep produces little change, produces an unpredictable response, or leaves the door unable to latch, stop and reassess the closer and the opening instead of adding larger turns.
Use the latch control for the final closing movement
The latch valve controls the final closing movement after the main sweep has brought the door near the frame. If the door stops short of latching, the latch speed may be too slow; adjustment guidance says to turn the latch valve counterclockwise in small increments to add closing force in the final phase. Test the result after each change.
The final closing movement gives you two distinct adjustment branches:
- The door stops short of latching or needs a push: Turn the latch valve counterclockwise in a small permitted increment, then test whether the latch engages.
- The door hits the frame hard during the last inch or two while the sweep is smooth: The latch valve may be set too fast. Turn it clockwise in a small permitted increment, then test again.
A door that stops in the final few inches may also have an arm-geometry, weatherstripping-resistance, or misaligned-latch issue. If the latch branch does not resolve the symptom with a permitted change, stop treating the problem as a speed setting.
The latch valve cannot correct a latch that does not meet the strike, a damaged latch bolt, or resistance from the frame and seals. Test the closing movement without pushing the door through the final inches. If the door needs manual pressure to complete the cycle after a small permitted adjustment, record that result and arrange qualified evaluation rather than masking the condition with more force.
Test one change at a time
A model-aware adjustment process keeps each change identifiable. Follow this order:
- Identify the closer manufacturer and model.
- Review the manufacturer’s adjustment instructions and locate the correct valve.
- Confirm that the observed symptom matches that valve’s function.
- Make one small adjustment permitted by the instructions.
- Open and close the door several times to test the result.
- Repeat only when the instructions allow another change and the test identifies a remaining setting issue.
Testing after each change prevents a sweep adjustment, latch adjustment, and spring-power change from becoming one unexplained result.
Adjustment size should remain deliberately small. Guidance gives typical changes around 1/8 of a turn or no more than a quarter turn at a time, depending on the closer, and the door should be tested after each change. Never remove or back out a closer adjustment valve too far; doing so can release hydraulic fluid, cause loss of pressure, and damage the closer.
The S and L valves are not designed to be completely unscrewed or removed. If a valve becomes loose, the closer leaks, or the control does not respond as expected, stop adjusting and arrange qualified service rather than trying to recover the setting by guesswork.
Write down the starting symptom, the control identified, the adjustment direction, the approximate increment, and the result of each test. Keep the record with the opening rather than relying on memory. If service becomes necessary, the sequence shows what changed and helps prevent another person from repeating uncontrolled adjustments.

Treat spring power as a separate decision
Spring-power adjustment requires the closer’s own model information because spring force and hydraulic speed are separate functions. On the LCN 4040XP, spring power is adjusted with the external dial on the spring tube rather than the S, L, or B valves. On a standard-duty adjustable closer, consult the manufacturer’s chart for the required number of hex-key rotations for the door size before changing spring tension.
A heavy-duty closer has an additional installation condition. The mounted closer and installed arm must properly preload the spring before spring tension adjustment can be made, and the manufacturer’s installation instructions govern that procedure. Do not treat a heavy-duty spring adjustment as a larger version of a sweep or latch adjustment.
Spring power affects both closing force and opening resistance. A fire door needs enough spring power to overcome latch resistance, but too much spring power increases opening resistance and can make the door difficult to open. The guidance describes closer sizes from 2 to 6, with higher numbers providing increased closing force.
Treat those values as guidance for the applicable opening, not as permission to change a closer without checking the product instructions, door conditions, and assembly requirements.
Use spring power only when the model instructions and the opening condition support that decision. A door that closes at the right speed but still fails to latch may have insufficient spring power, but it may also have hinge, frame, seal, strike, or latch resistance. On a fire-rated or accessible opening, changing force without considering both closing and opening behavior can create a different problem. If the model, size, or adjustment chart is unknown, leave the spring setting alone and arrange qualified review.
Verify closing, latching, speed, and usable force
The adjusted door should be tested through its normal operating cycle, not judged from one release. Open and close the door several times after an adjustment, then make only the further small changes permitted by the closer instructions. Check that the door moves through the main arc without slamming, reaches the frame, and latches without a push.
The final latch movement should be fast enough to latch the door without slamming. Spring power should not be increased simply to overcome a hinge, frame, seal, strike, or latch fault, because the added force can make the opening harder to use.
A useful test record includes the closer model, the original symptom, the control changed, the direction and size of the change, the number of cycles tested, and the resulting closing and latching behavior. Stop the adjustment if the door still behaves dangerously, remains unreliable, or shows a condition that the valve cannot correct.
Measure the parts of the cycle that matter instead of estimating them. For accessibility guidance, time the closing or swing movement from 90 degrees open to 12 degrees from the latch; the stated limit is no faster than five seconds. A stopwatch or phone timer is identified for that check. Opening force is a separate measurement, so a door that feels acceptable by hand has not automatically been shown to meet the stated force guidance.
Apply the fire-door verification gate
A fire-rated opening must be treated as a complete listed assembly, not as an ordinary door with a faster closing setting. A fire door must have a closing device that returns it to the fully closed position from any angle of opening and overcomes latch resistance and air-pressure differences. The applicable fire-door guidance states that swinging fire doors must self-close and self-latch from any open position without manual assistance, subject to limited exceptions requiring specific AHJ approval.
A door that stops short, requires manual assistance, or fails to latch is not ready to be returned to normal use merely because the closer body appears adjusted. Check the complete opening and arrange qualified service when the closing or latching function remains unreliable.
The closer, latch, and other hardware must remain compatible with the fire-rated assembly.
Do not disable, bypass, remove, or substitute life-safety hardware as a shortcut for a closing problem. A valve adjustment cannot replace assembly compatibility, correct installation, or qualified review of a fire-rated opening.
The fire-door requirement and the accessibility check must be considered together when the same opening serves both purposes. The door needs enough force to close and latch, but excessive spring power can increase opening resistance. A closing test that confirms latching while making the door difficult to open is not a complete operating check. Keep the listed assembly, the closer instructions, and the opening’s use in the same review.
Stop and arrange qualified service when the opening signals a larger problem
Qualified service is the appropriate next step when the closer is leaking or damaged, the door will not latch reliably, or the problem persists after an adjustment permitted by the model instructions. If the closer leaks oil or hydraulic fluid, adjustment will not correct the condition; the service guidance says the closer should be replaced rather than adjusted further.
Stop adjusting when any of these conditions appears:
- Hydraulic fluid or oil is visible on the closer or below it.
- The arm, body, mounting, door, frame, hinge, strike, or latch is damaged or loose.
- The valves reach their permitted adjustment range without correcting the symptom.
- The door slams, behaves unpredictably, or creates a dangerous operating condition.
- A fire-rated or required egress door will not close and latch.
- The symptom remains after a model-permitted adjustment and repeated testing.
Record what you observed and which permitted change you made. Give that record to the qualified service provider instead of continuing with random turns.
A visual check or generic tutorial does not constitute a compliance review, and incorrect adjustment can affect the complete door assembly. That boundary matters in schools, hospitals, churches, arenas, and other public buildings where a single opening may also be part of a fire, egress, or accessibility requirement.
Keep the opening under the facility’s established control process while qualified help is arranged. Do not wedge the door open, disable a closer, remove a latch, bypass a life-safety device, or make an uncontrolled modification to keep the opening operating.
The service decision is not limited to a failed adjustment. A leaking closer needs replacement rather than more adjustment, and a persistent latching problem needs evaluation of the complete opening. A fire-rated or required egress door that remains unreliable should be treated as a priority service condition. Preserve the opening’s required function through the facility’s established process while qualified personnel assess the door, frame, hardware, and closer together.
Prepare the next service conversation
A useful follow-up begins with a clear opening record rather than a guess about which screw is wrong. Gather the closer manufacturer and model, the door’s location and use, the exact symptom, visible conditions around the hinges and frame, the control you identified, the adjustment direction and size, and the result of repeated testing.
Use a qualified professional to decide individual suitability when the opening involves fire protection, egress, accessibility, damage, or a persistent closing and latching problem. A complete record lets the service discussion focus on the opening’s condition and the next permitted action.
For a commercial door closer setting or opening condition that needs review beyond a cautious model-specific adjustment, keep the model and test record available when you request follow-up about your inquiry.
Start Your Build
Got a project? We'll bring frames, doors, hardware, and the expertise to keep every opening on schedule.